HOW-TO: Add Stickers to Your DuckyWood Homepage
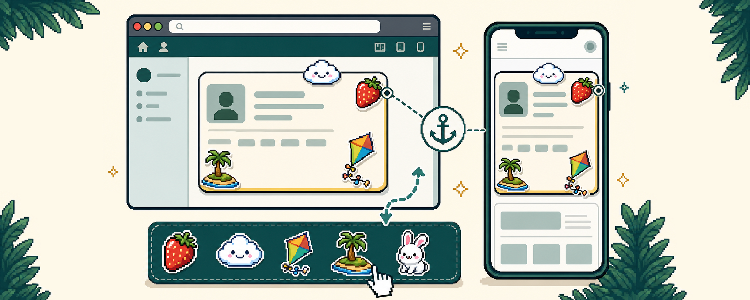
Decorate your homepage with items from your sticker inventory. You can arrange a separate design for desktop and mobile layouts, resize each sticker, flip it, change its layer, and anchor it to a homepage card so it stays attached when the page changes width.
 Aeryk
Aeryk
Hello! Aeryk here! Thought it was time to have a more in-depth look at DuckyWood homepages. Below you'll find a comprehensive list of the features available that will help you customize your DuckyWood homepage to your liking! If you have any questions, feel free to reach out to a DuckyWood Staff member!
Before You Start
You need at least one sticker in your inventory. Stickers may come from the DuckyWood Store, giveaways, wheel prizes, or other rewards. All you'll need are some feathers to purchase stickers. If you don't have any, start off by spinning the daily wheel in the Games page.
Homepage editing works best from a desktop computer with a wider browser window. You can still design the mobile version from the editor by selecting Mobile at the top of the homepage.
Open Your Homepage Editor
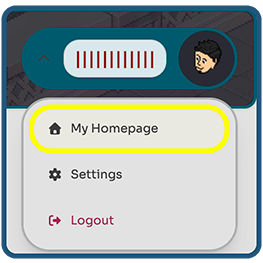
Open your DuckyWood homepage by clicking the drop-down menu located in the upper right corner of the webpage.
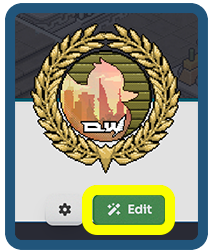
Find the Edit button above your Profile card and select it.
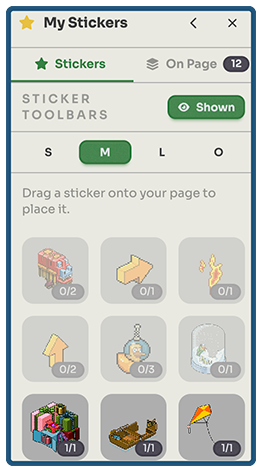
The My Stickers panel opens on the right side of the page. This panel contains:
Stickers: every sticker in your inventory that is available to place in the selected layout.
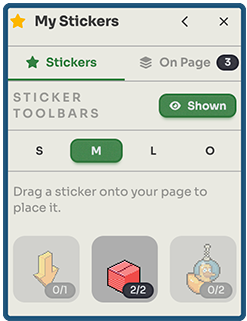
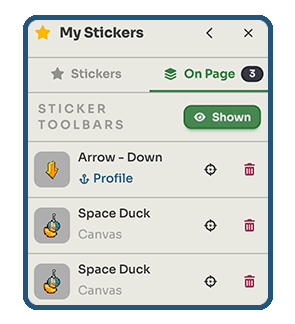
On Page: Displays the current stickers already placed in the selected layout and it's associated anchor tag.
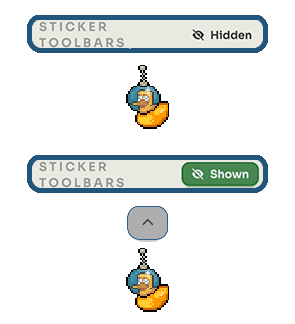
Sticker Toolbars: shows or hides the editing toolbar above each placed sticker. Hiding the toolbar can come in handy if you're looking at fine tuning sticker placements!
S, M, L, and O: chooses the starting size for the next sticker you place. Or, you can change it from the sticker toolbar.
Understand the Two Homepage Views
Your homepage has two independent sticker layouts:
Desktop is shown to visitors using a tablet or computer-sized browser window.
Mobile is shown when the web page is narrower (less than 768 pixels to be exact)
Use the Desktop and Mobile buttons above the homepage to switch between the layouts.

The Mobile editor displays your homepage inside a narrow preview. This lets you arrange stickers for a phone without changing the Desktop layout.
Your inventory works in both views
Each owned sticker copy can be used once in each layout.
For example, if you own one Space Duck sticker:
You can place one Space Duck in the Desktop layout.
You can also place one Space Duck in the Mobile layout.
Using the Space Duck on Desktop does not consume the Mobile placement. When you switch to Mobile, it appears available again. Its counter changes separately in each view.
Place a Sticker
Confirm that the correct layout, Desktop or Mobile, is selected.
Choose S, M, L, or O in the inventory panel.
Press and hold the sticker in My Stickers.
Drag it onto the homepage.
Release it where you want it to appear.
The inventory counter shows how many copies are available in the current layout. A counter of 1/1 means one of one owned copies is available. After placing it, the counter becomes 0/1 for that layout.
To move a placed sticker, press and drag the sticker itself. The side panel temporarily moves out of the way while you drag.
Open the Sticker Toolbar
Every placed sticker has a small arrow button above it. Selecting that button will expand the sticker toolbar.
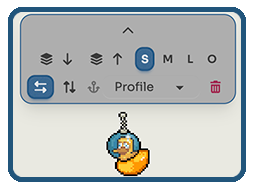
The toolbar includes:
Send to back: moves the sticker behind other homepage content.
Send to front: moves the sticker above other homepage content.
S, M, L, O: changes the sticker's size.
Flip horizontally: mirrors the sticker from left to right.
Flip vertically: turns the sticker upside down.
Anchor menu: attaches the sticker to a homepage card.
Trash: removes the sticker from this layout.
Removing a sticker from the page does not remove it from your account. It becomes available in that layout's inventory again.
Anchor the Sticker to a Card
Anchoring is the most important tool for a layout that behaves well at different browser sizes.
You may hear this setting described as a sticker's anchor tag or anchor target.
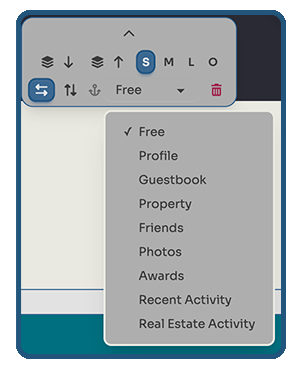
The anchor menu includes Free plus the available homepage cards, such as:
Profile
Guestbook
Property
Friends
Photos
Awards
Recent Activity
Real Estate Activity
Free placement
When the anchor menu is set to Free, the sticker is positioned on the overall homepage canvas. It stays at that canvas position and is not attached to a particular card.
Free placement is useful for:
Stickers that decorate the overall page background.
Large decorations that span open space.
Items that should not follow a specific card.
Card-anchored placement
When you choose a card such as Profile, the sticker's position becomes relative to that card.
Expand the sticker toolbar.
Open the menu beside the anchor icon.
Choose the card the sticker should follow.
Drag the sticker to its final position around that card.
The On Page tab displays an anchor icon and the selected card name, making it easy to check which stickers are anchored.
Why anchoring matters
Homepage cards can move when the browser window becomes resized. For example, a card in the right column may move below the Profile card. A free sticker keeps its canvas coordinates, so it may no longer line up with the card you intended to decorate.
An anchored sticker moves with its selected card. Its position stays fixed relative to that card even when the page is resized or the card moves into a different column.
For stickers that overlap a card edge, badge a corner, point at card content, or act like tape or a paper clip, always choose that card in the anchor menu.
Below is an example of the Arrow - Down sticker that is not anchored to a card vs one where it's anchored to the Profile card when the browser window is resized.

In this example, it was best to have the Arrow - Down sticker anchored to the Profile card if the intended action was to stay above the user's avatar.
Home / Avatar Backgrounds
At some point, you might decide you want to change your background of your homepage. Backgrounds may come from the DuckyWood Store, giveaways, wheel prizes, or other rewards.
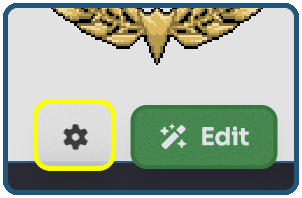
There are two routes to change either background. If you're already on your homepage, click the Cog icon next to the Edit button.
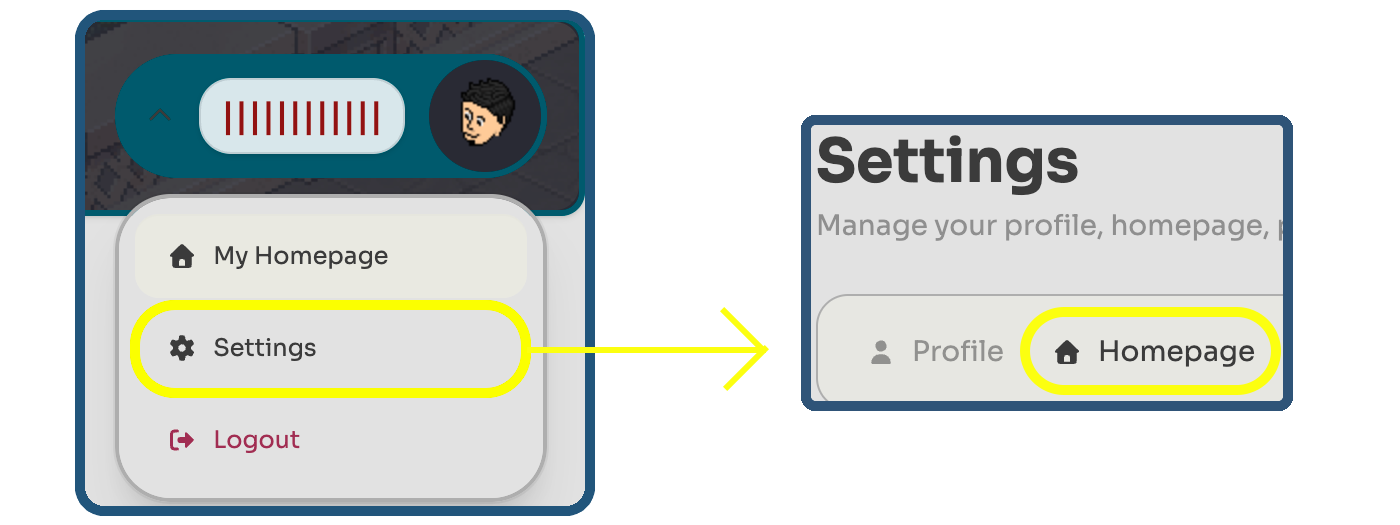
Or, you can access the same page by going to your User Settings page and clicking the Homepage tab.
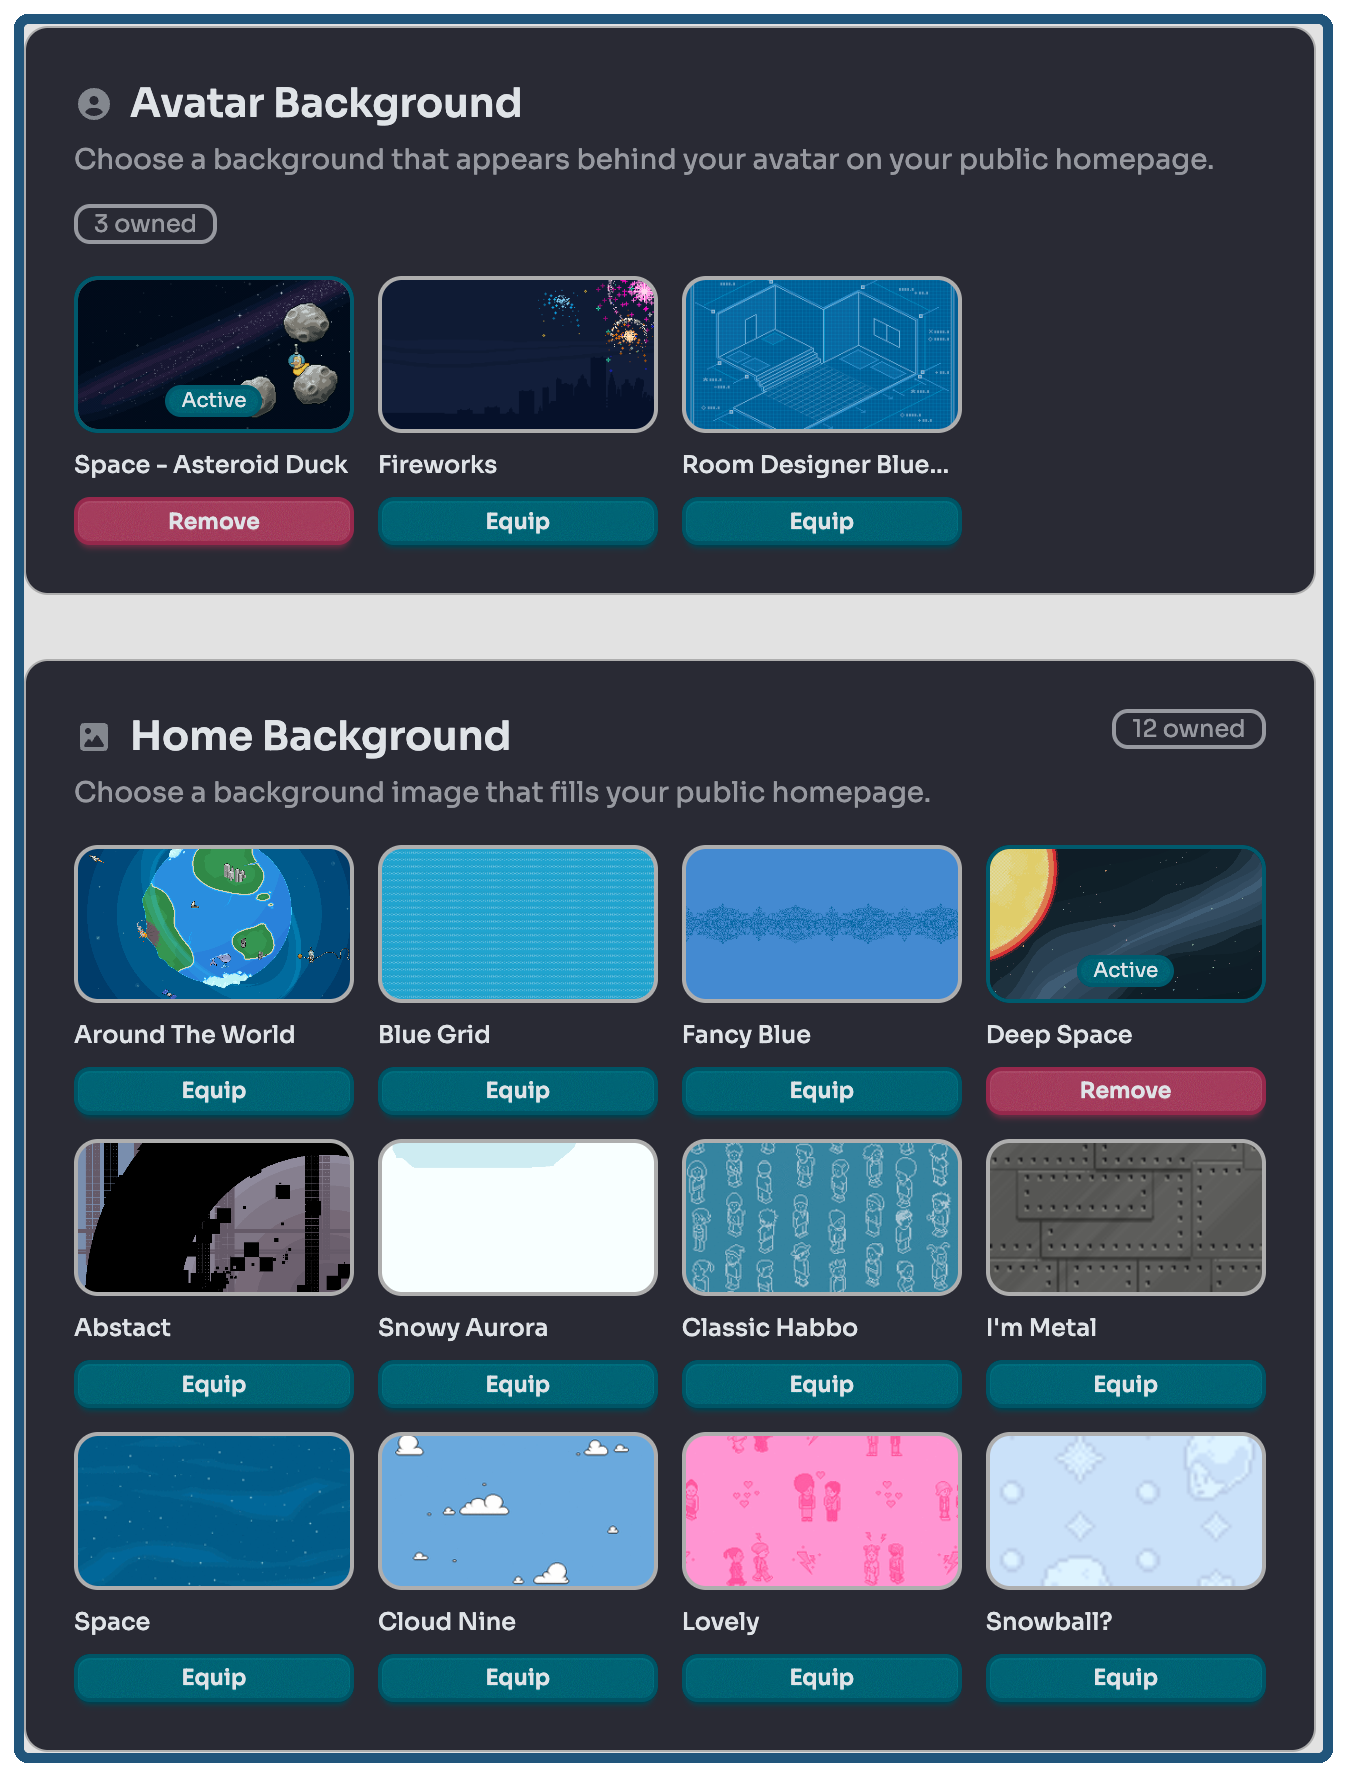
From there, you can view which backgrounds are available to you. Simply click the Equip button to apply the background immediately. Or, if you already have a background equipped and decide you dont want one anymore, simply click the Remove button to unassign it from your account. (Remove does not permanently delete it from your account.)
Well, I think that was enough information overload to get your started! If you have any questions, problems, or feedback feel free to reach out to a DuckyWood Staff member! Or, use the Feedback / Report a Bug feature located at the footer of any DuckyWood page!